Consumer Tips: Facebook Privacy Guide – How to Turn On Secure Browsing
FAQ: How do I turn on secure browsing in Facebook? (And why should I?)
Facebook gives you the option to use use secure browsing when a secure connection is available. This is a security option that all Facebook users should use. It is a no-brainer to say yes to. Facebook has turned this option on by default, but the rollout for this option may not have reached your area. Also, there may be some country-level differences. It is worth taking a few steps to make sure turn this option is on. It is well worth it, and we highly recommend it for all users.
First things first. What is secure browsing? Secure browsing means that you are connecting online through a secure connection, also called an encrypted connection. You have probably used secure connections before, for example, you will usually be on a secure connection when you are making online purchases, or doing online banking. A secure connection will read https:// in the URL or address bar. Regular connections read http:// in the URL bar.
The reason for using a secure connection is so that your communications provider (like your mobile phone provider, or your wifi provider ) does not get the information you are giving Facebook as it passes through their network. If you use an insecure http:// connection, the communications provider can capture the text, images, and other data you are sending along to Facebook. Facebook has a blog post with more information about the default settings and how their secure browsing works.
Turning on Facebook Secure Browsing on Mobile Devices:
To check the secure browsing option in Facebook go to Account Settings —> Security –> and then ensure a tick is in the Secure Browsing box (See screenshot 1).
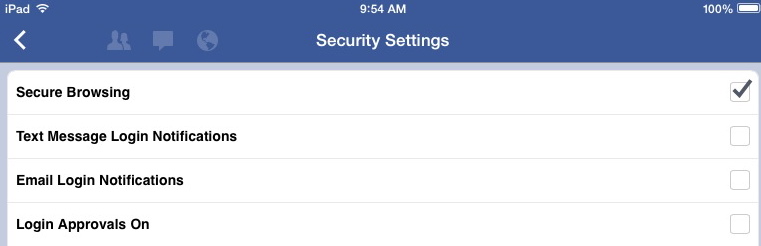
(1) Facebook’s Secure Browsing setting for mobile. Go to Account Settings –> Security —> tick the Secure Browsing check box if it is not already checked. Your mobile device will browse with secure connections when available.
Turning on Facebook Secure Browsing for Laptops and Computers:
The overall process for checking or changing this setting on a laptop or computer is to go to Account Settings —> Security —-> Click Edit on Secure Browsing —> ensure that the check box that says Browse Facebook on a secure connection (https) when possible is ticked —> Click Save Changes. For a step-by-step look at this process, read on below.
Sidebar
To find Account settings, look for the gear symbol from your home screen and click it. Account Settings will be in the drop down menu you see right after you click.
![]()
This is the Account Settings gear icon in Facebook
After you click Account settings, you will see the Settings Page (screenshot 2). Here, click on Security, in the left menu. Then look on the first line to the right, Secure Browsing, and click the Edit link to the right.
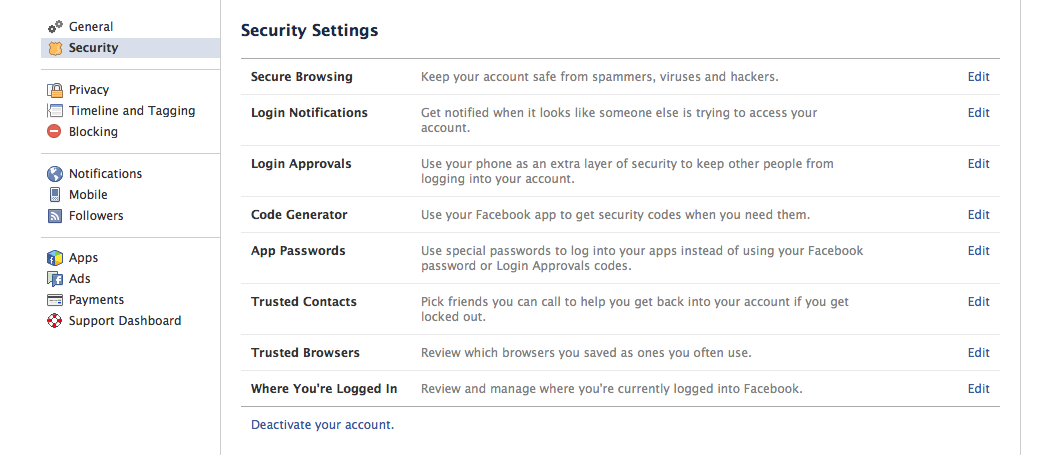
(2) Facebook’s Settings Page for laptop computers. In this screenshot, we have selected the security tab in the left menu. To select Secure Browsing, click the blue Edit link to the right of the Secure Browsing line, at the top.
After you click the blue Edit link, you will see the Secure Browsing Settings box (screenshot 3). Here, put a tick mark in the box if it is not already there, and click Save Changes.

(3) Ensure a tick mark is in the box to require Facebook to use secure connections when they are available. Click Save Changes to finish.
After you click Save Changes, you will have successfully ensured this feature is set to on when you are using Facebook. Facebook’s general policy is to set this feature on by default, but it is still important to check that your setting is in the “on” position.
Advanced user tips:
If you are an advanced user, you may want to go a step further and use encryption on all of your web browsing. If you use the Firefox or Chrome browser, you can use a plugin called HTTPS everywhere to facilitate that https://www.eff.org/https-everywhere. Another plug in for Firefox is HTTP nowhere, which blocks unencrypted connections. https://rx4g.com/http-nowhere/.
And just a note: Wifi users should use encrypted connections whenever possible… no matter what kind of device you are using.